Quick Start Guide for Managed Staff Cloud Devices
This summary of the quick start guide will help familiarise you with some of the features and changes of Windows & applications and working policies & processes that can assist with safe and productive working.
Before You Begin
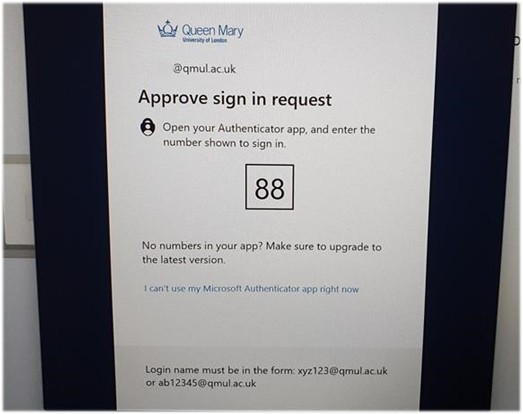
You should hopefully have your fresh and ready QMUL laptop with you. You should also try to keep it plugged into a power source through the initial set up period, particularly during updates. If you’re new to QMUL, your account should be confirmed as ready by IT Services via your manager. This means you have multi-factor authentication (MFA / 2FA) enabled and accessible on your phone or an alternative authenticator.
If your MFA is not yet configured, please consult the relevant ITS Self-help Page.
You should also make sure you’re still familiar with the latest iterations of the ITS Policies, particularly IS01 - Information Security & Acceptable Use Policy
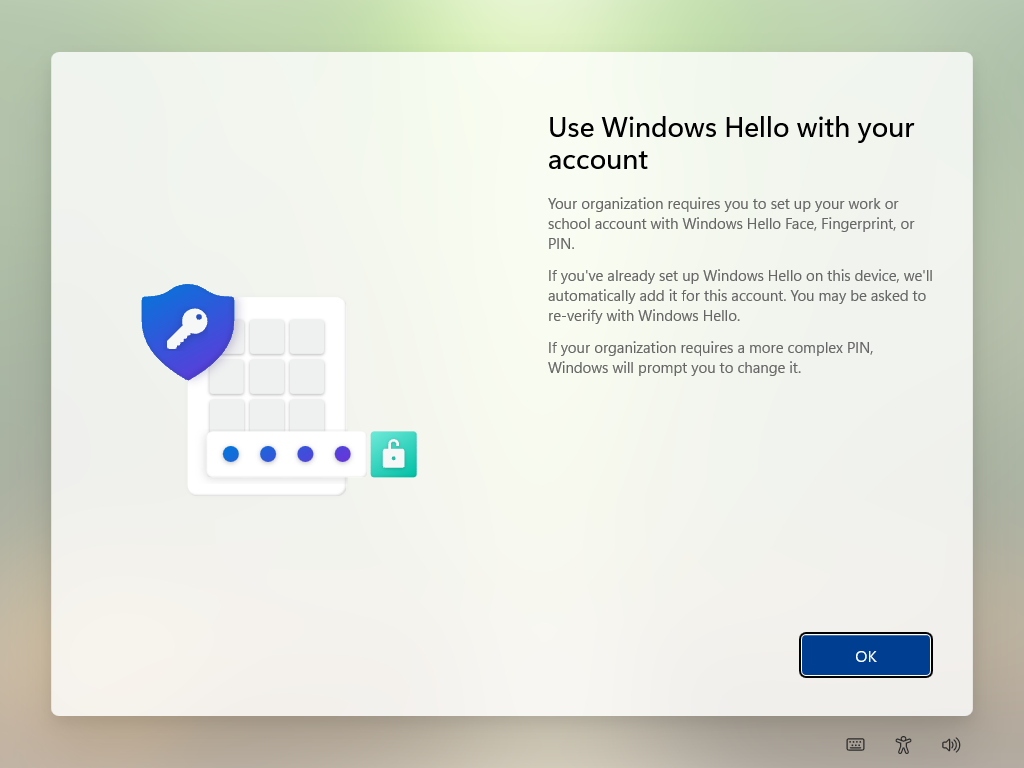
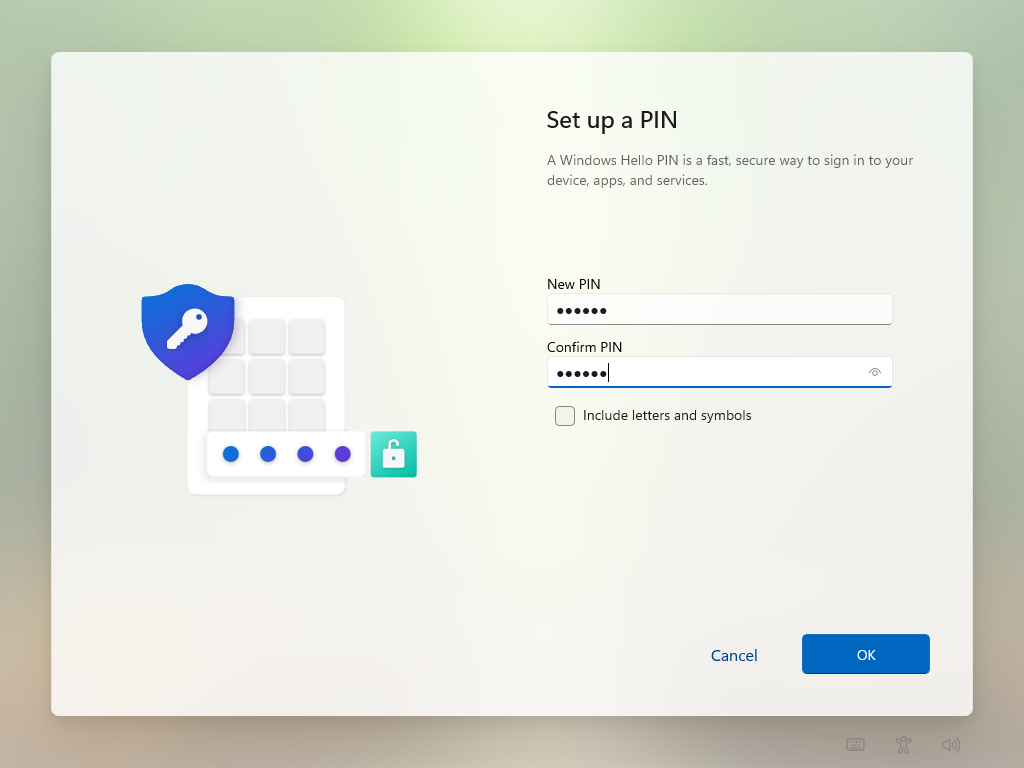
A Windows Hello for Business (WHfB) PIN is a device-bound authentication method used to sign in securely without a password. The PIN is tied to your device and backed by security hardware (e.g. TPM) where available.
Creating Your PIN
When enrolling your device, you will be prompted to create a PIN at a minimum of 8-digits
Key Security Guidance
- Choose a PIN that is not easily guessable (e.g. avoid 123456 or repeated digits).
- Your PIN:
- Is only valid on this device
- Cannot be used to sign in elsewhere
- Repeated unsuccessful attempts may result in lockout (device security enforced).
Signing in with Your PIN
After setup:
- At the Windows sign-in screen, select Sign-in options.
- Choose the PIN icon.
- Enter your PIN to access your device.
Resetting Your PIN
You can reset your PIN in two ways:
1. If You Know Your Existing PIN
- Sign in to your device.
- Go to Settings > Accounts > Sign-in options > PIN (Windows Hello).
- Select Change PIN and follow the prompts.
2. If You Have Forgotten Your PIN
- At the sign-in screen, select I forgot my PIN.
- Authenticate using:
- Your account password
- Multi-factor authentication (MFA)
- Create a new PIN.
What Happens When You Reset Your PIN?
- Resetting your PIN generates a new cryptographic key.
- As a result:
- You may need to re-register biometrics (e.g. fingerprint or face recognition).
- You may need to re-register any services relying on passkeys or WHfB credentials.
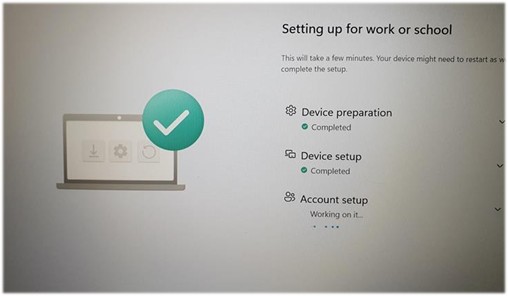
Getting to the Desktop


Applications
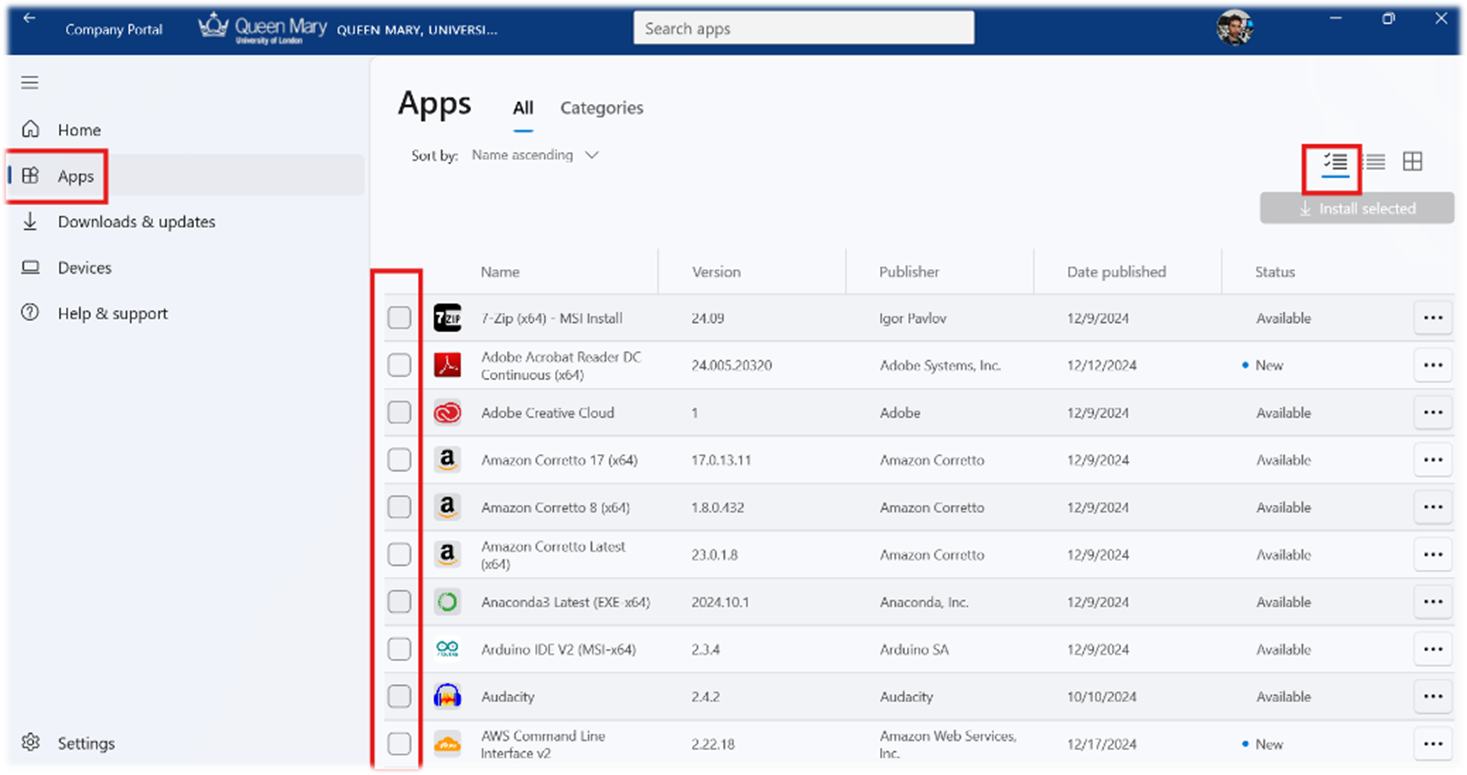
The portal for QMUL-managed applications is now Company Portal not Software Centre, as you might be used to previously: Click here for more details.
Applications are available to you in multiple ways:
Installed as standard
- Company Portal
- M365 Apps
- PaperCut Print Deploy (Follow-me Printing)
Free Software Available via Company-Portal
- Adobe Reader
- Google Chrome
- 7-zip
- Notepad++
- Forticlient VPN
- and much more...
Department-assigned Software
This software should be available via Company Portal based on your departmental designation.
e.g. Engineering Apps for Engineering departments
Additional, per-user licensed Software
If the software is not available via Company Portal, you may need to request it via the ITS Helpdesk.
Using Company Portal


Requesting Help
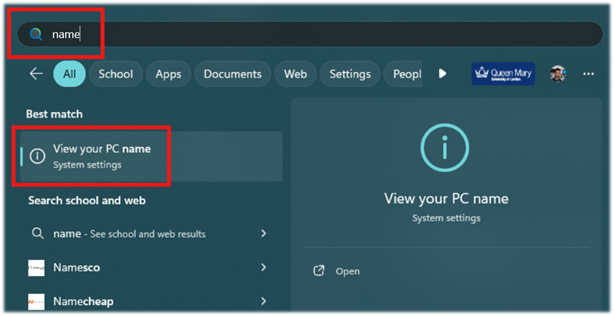
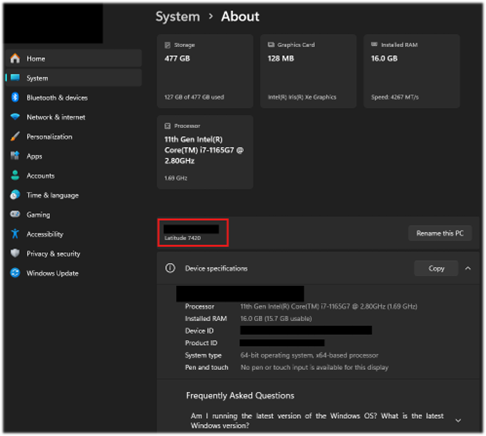
If you run into any problems, please don’t hesitate to raise a ticket with IT Support on ServiceNow. You’ll need to provide your computer name, which you can find by searching name in the start menu.